Effortlessly Auto-Send Microsoft Forms Responses to SQL Database with Power Automate
In this post, I will guide you through a practical Power Automate flow that captures responses from Microsoft Forms and inserts them directly into a SQL database using a stored procedure. Whether you're gathering survey data, feedback, or operational inputs, this approach automates the transfer of structured form entries into your database without any manual intervention. We’ll use: Microsoft Forms to collect responses Power Automate (Flow) to automate the process SQL Server (Premium...

In this post, I will guide you through a practical Power Automate flow that captures responses from Microsoft Forms and inserts them directly into a SQL database using a stored procedure. Whether you're gathering survey data, feedback, or operational inputs, this approach automates the transfer of structured form entries into your database without any manual intervention.
We’ll use:
Microsoft Forms to collect responses
Power Automate (Flow) to automate the process
SQL Server (Premium connector) to insert the data using a stored procedure
Let’s break this down step by step.
Check out some of our FREE templates and materials.
PRACTICE MATERIAL BELOW!👇
Step 1: Create the Form in OneDrive/SharePoint
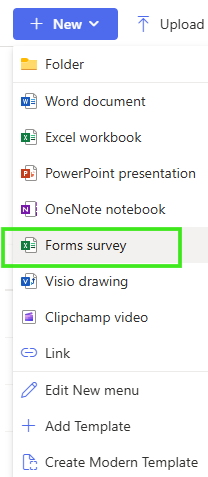
Start by going into OneDrive or SharePoint > Click New > Forms survey. This will open a new browser tab where you can begin designing your form.
In this case, I’ve created a simple form with a couple of questions. You can add multiple fields depending on the data you want to collect. These fields will later become the parameters for your SQL stored procedure.
Step 2: Note the Form ID and Structure
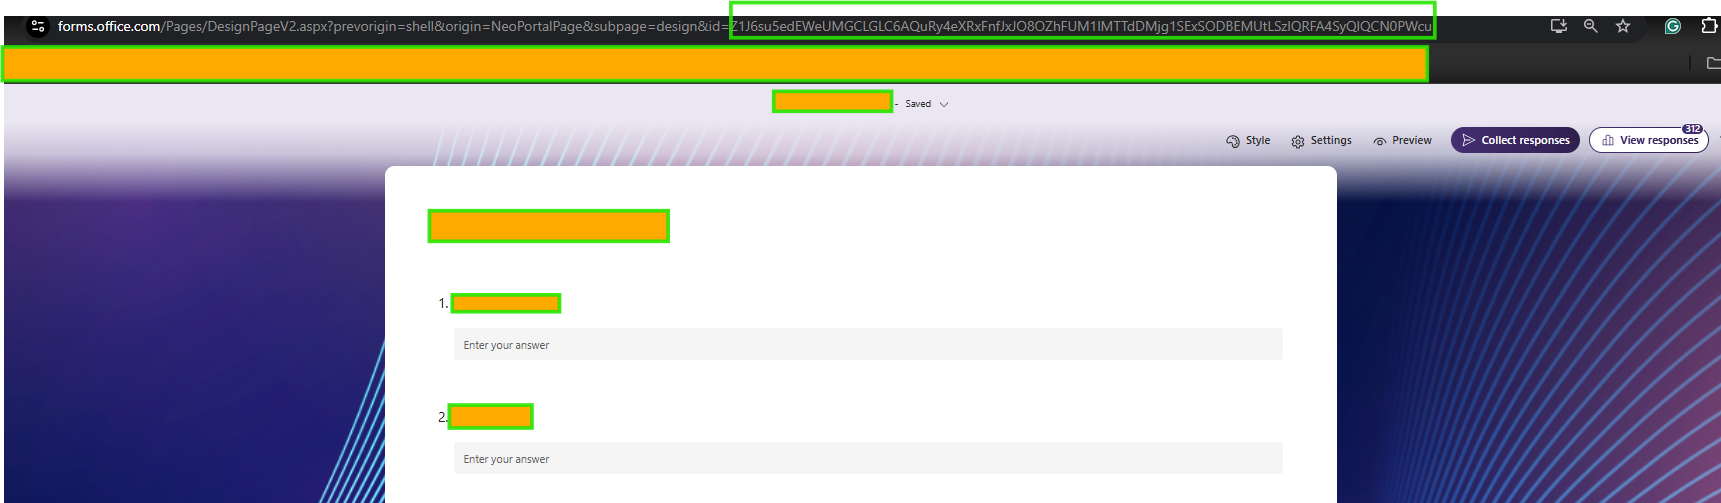
After your form is created, the Form ID can be found in the URL — this is essential for setting up your Power Automate trigger later. In my case this was an ID: Z1J6su5edEWeUMGCLGLC6AQuRy4eXRxFnfJxJO8OZhFUM1lMTTdDMjg1SExSODBEMUtLSzlQRFA4SyQlQCN0PWcu
In this example, you see two short-answer fields. Every response submitted will be processed by your Power Automate flow.
Step 3: Build the Power Automate Flow Logic
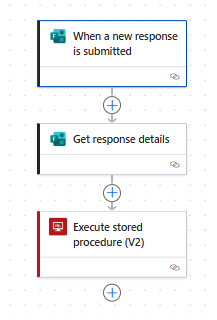
Here’s a look at the full Power Automate flow structure:
Trigger: When a new response is submitted
Action 1: Get response details
Action 2: Execute stored procedure (SQL Server)
Each of these steps plays a critical role in fetching and pushing form data into SQL Server.
Step 4: Configure the Trigger
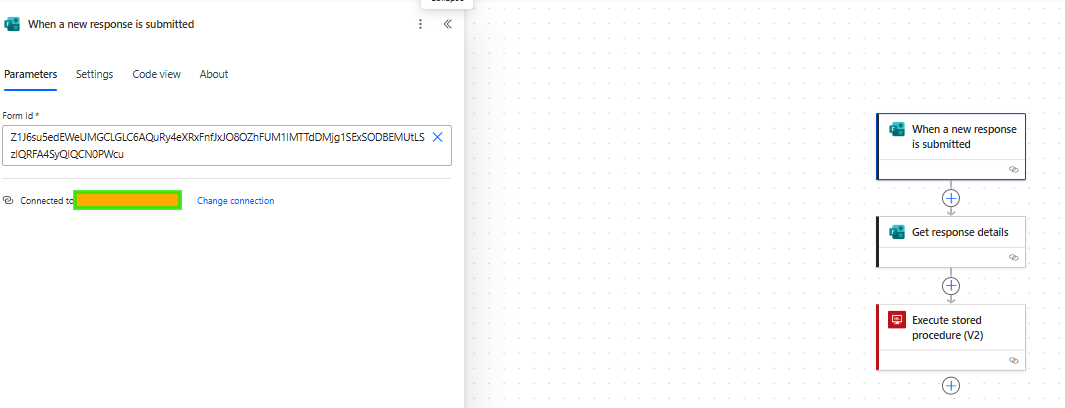
In the “When a new response is submitted” trigger (part of the Microsoft Forms connector), paste the Form ID you copied from the form URL.
This ensures your flow listens to the correct form. The connection shown is to your Office 365 identity — make sure you’re using an account that has access to the Form.
Step 5: Extract Form Response Details
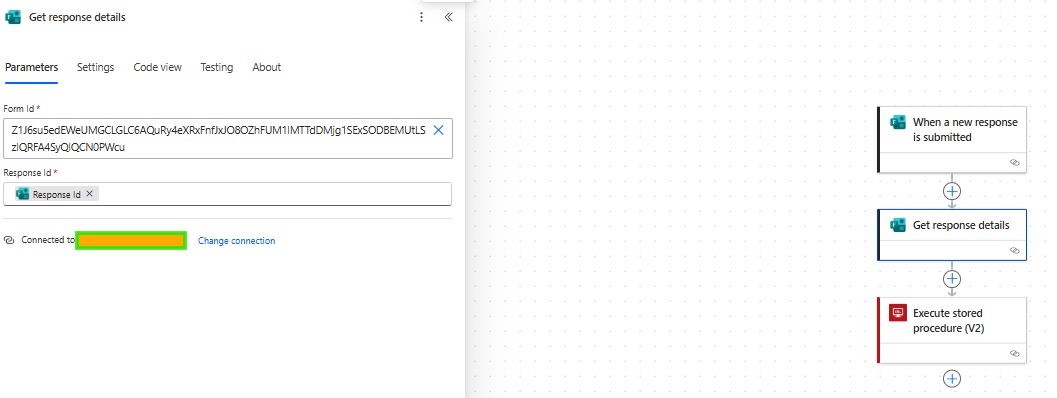
Next, add the “Get response details” action. Again, use the same Form ID, and for Response ID, choose Response Id from dynamic content — this links back to the actual form submission.
This step fetches the answers submitted for all the form questions.
Step 6: Choose the SQL Server Action
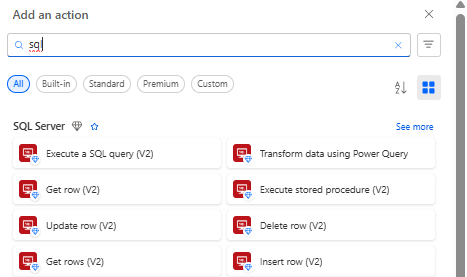
Search for SQL in the “Add an action” window. You’ll find several options under SQL Server (Premium Connector).
In our use case, we’ll go with “Execute stored procedure (V2)”, which is best suited for structured inserts into SQL Server databases.
🏷️ Note: SQL Server is a premium connector, so a paid Power Automate plan is required.
Step 7: Map the Form Data to SQL Parameters
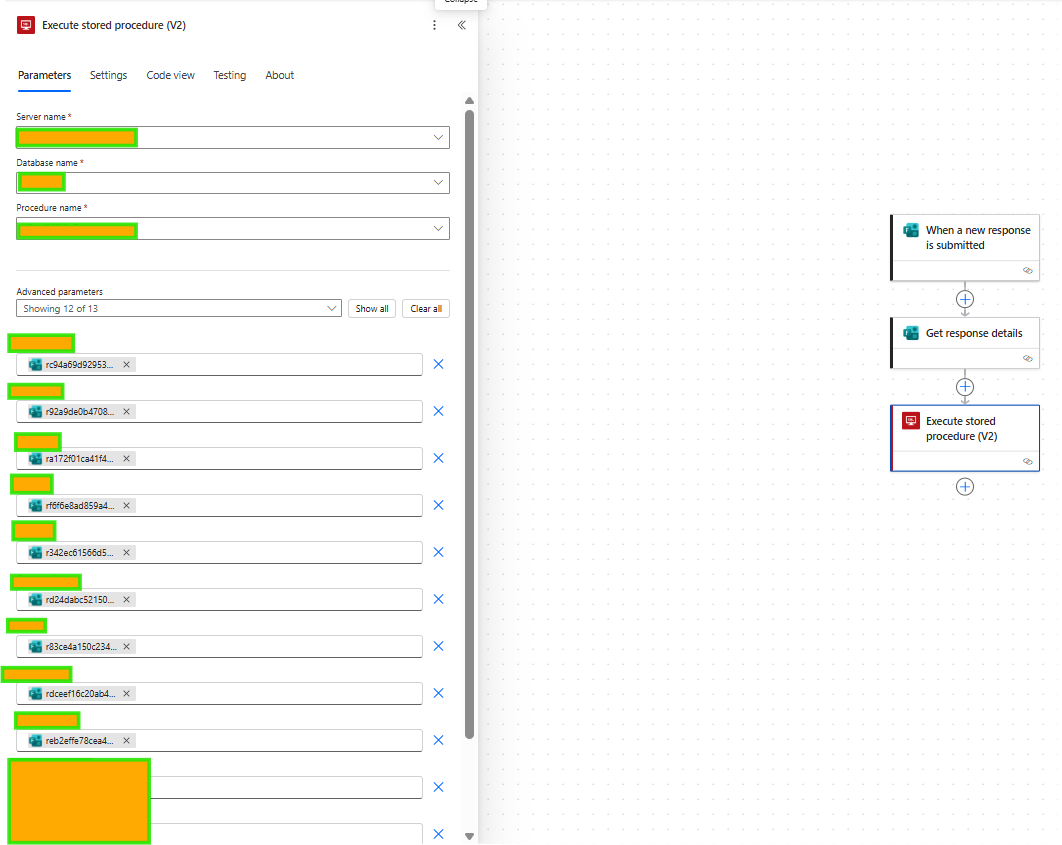
Now configure the action:
Choose your Server name, Database name, and your predefined Stored procedure.
Once selected, the flow reveals all stored procedure parameters.
Map each of these to the corresponding dynamic values pulled from the form response.
This securely passes the data from Forms to SQL Server, row by row.
Final Notes
✔ Always test your flow with dummy responses.
🧪 Consider adding error handling (e.g. scope with "run after").
🔐 Ensure the SQL Server is reachable via your on-premises gateway if needed.
📄 Use logs or logging tables to track successful inserts for auditing.
for custom connectors you need Premium (Power Automate) license

Mastering DAX Queries in Power BI: Structure, Logic & Best Practices
Read insight